
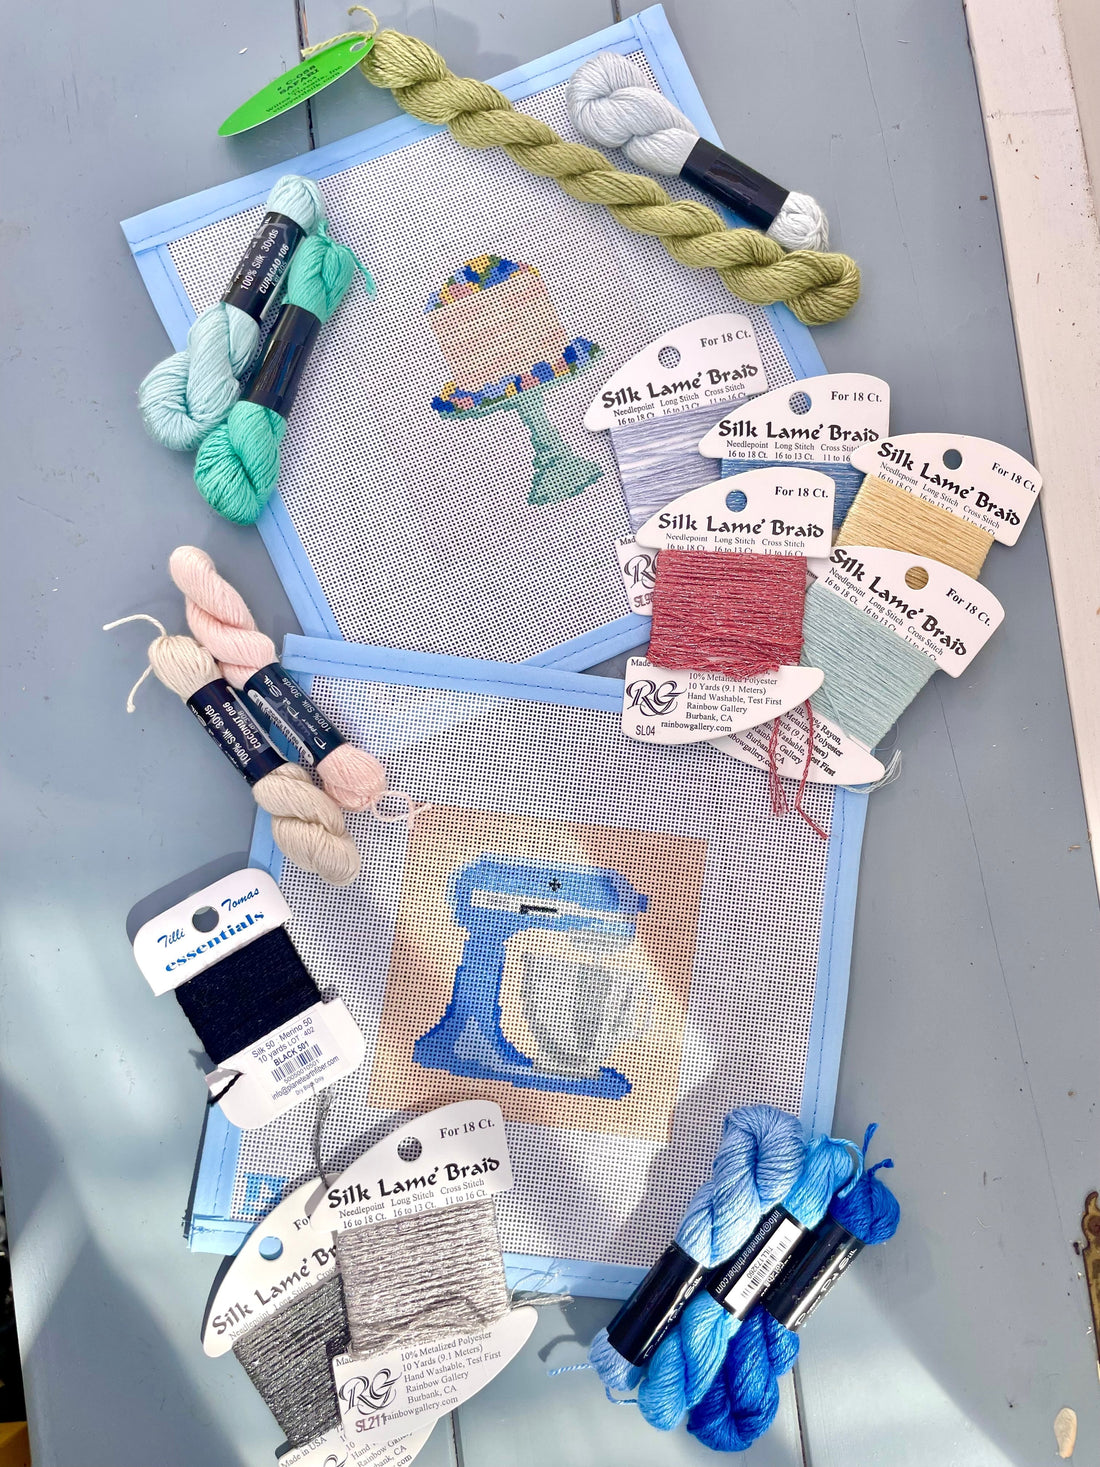
Thread Recommendations: Cake Stand & Stand Mixer
This weekend we launched the most darling spring duo of canvases- our baking duo featuring both a lovely minty green cake stand and a beautiful blue stand mixer. My vision for these canvases was a color palette that was fresh for spring and soft to blend perfectly into your home. I plan to stitch mine up and frame them in our kitchen! Here's what I am using to stitch them up!
Cake Stand:

This one definitely has more colors than the stand mixer, however it is very customizable! Any of the flower colors can be easily swapped for colors that match your home, colors that use up thread in your stash, or perhaps to match wedding colors for a pretty bridal gift! I highly recommend giving French knots a try for the flowers for a more dimensional and textured look- don't be intimidated by them- you can do it! Here are my recommendations based on the colors I am using for mine:

Stand Mixer:

So, the stand mixer we have in our house is actually black (my husband already had it before we got married), but I loooove the blue ones! Given the longevity of these, we'll have the black one for a long time I'm sure! If you're looking to color swap the blue for the color of your own mixer, you totally can! Just make sure you are using a fiber that provides decent coverage in order to cover the blue. To swap the colors, you will need three shades of a color (for red, I'd recommend a pink, a red, and then a crimson/maroon color!). Here's what I'm using for this one!

A few extra notes- both designs are on 18 count mesh meaning that pepper pot silk, vineyard silk, DMC 6-strand embroidery floss, silk lame braid for 18 mesh, and tilli thomas essentials are all great options for stitching! Additionally, the backgrounds on both canvases are pretty light- meaning you could switch those up if you wanted a different look or use the same for both for a matching look!
I hope you have so much fun stitching these!
Happy stitching & sailing!
Paige